One would think that after 22 years in the classroom, 25 years in education and with a Masters degree in Educational Technology that I’d have the whole parenting a digital student thing figured out. I’m here to tell you that this is not the case!! I have spent the past 12 months navigating online learning for my middle-schooler, and I have certainly found myself up against all the challenges of playing this role!
Late assignments, missed assignments, half-hearted effort, oversleeping, procrastination – I’ve seen them all in the past twelve months!!
I am fortunate to be married to an educational psychologist (also my child’s father, we are not a blended family) and so we parent together with significant knowledge, training, experience, and understanding of the brain development of children. Brain development is our biggest philosophy in terms of parenting choices.
In late February 2021, I hosted an evening session for parents of online students in my school jurisdiction. It was an excellent exercise to put myself through the process of thinking about my own experience as a parent of a virtual student, and to put my experience and knowledge into a cohesive presentation.
I also created a companion booklet with a couple of printable workbook pages at the back for parents to use to cover the topics I spoke about in my evening presentation.
So, parents, here is a recording of the presentation, and you are most welcome to print the above-linked booklet should you wish to have a copy.
You’ve seen other teachers using them. They’re super cute. Students love them. They bring a sense of excitement and reality to the virtual classroom. But how…. how do they make these Bitmoji classrooms?
First things first. That little white-haired teacher is my Bitmoji. If you don’t yet have a Bitmoji, you’ll need to download the app to your tablet or smartphone. Once you’ve done that, you can begin the fun process of creating a miniature cartoon-version of yourself. After you’ve created your little mini-me, Bitmoji provides you with a wide array of choices and positions using your creation.
I created this Math Bitmoji Classroom using the background and items from the Deluxe Bitmoji Classroom Template Set that I sell on Teachers Pay Teachers. Each of the 16 items on the shelf link directly to an online math manipulative allowing for quick access to these tools in a virtual classroom setting, or in a traditional classroom. Additionally, the clock links to a website where time-telling is the focus. These links can be easily changed or adjusted at any time.
So, how do we create a Bitmoji Classroom? I build mine in Google Slides, but Powerpoint or Keynote are also viable options.
The first thing I do is set the background. In Google Slides, I right click on the background of the slide, and choose an image. For my virtual classrooms that I sell on Teachers Pay Teachers, I have set the sizes for the background to fit widescreen Google Slides (1600 by 900 pixels). I have built my Bitmoji Classroom backgrounds in Adobe Illustrator to prevent the images stretching, skewing or pixelating once they are set as the background.
Once you have the virtual classroom background set, you’ll need to decorate it and furnish it! If you are going to create this yourself “from scratch”, you will want to make sure that the images you use are free from copyright restrictions.
In a Google image search, you’ll need to go into the “More” menu and under “Usage Rights” you’ll need to make sure “Creative Commons license” is checked off. You can see from the image below that it does NOT default to show Creative Commons License images.
If you choose to build your Bitmoji classroom using Google Slides, you can search for images inside of slides, and the filtration for Creative Commons licensed images will occur automatically. Google understands that if you are inserting an image into a slide that you are creating (or a doc for that matter), that you are REUSING the image, and therefore Creative Commons licensing is warranted.
From there, it’s really the same as creating a slide for a presentation. You can drag the images around, and create fun classroom scenes!
If an image ends up being “behind” and image that you want it in front of, you need only right click on the image, choose “order” and then send it backward or bring it forward to change this scenario! In the image below, my Bitmoji appears behind the chair. (A bit tough to see with that drop menu in the way, but you see what I mean.) I will choose “bring to front” for her, as the teacher image on this slide can be in front of everything. If I wanted her to be behind a desk, I’d need to play with it a bit.
Of course, you can always pick up a pre-made Bitmoji classroom template and just do the fun part… copy-paste your classroom decorations into one of the pre-made virtual classroom templates!
And just in case you prefer to learn visually with video, I’ve prepared this video that shows you exactly how to create your virtual Bitmoji Classroom!
I had the opportunity today to present to teachers in my school division regarding students bringing cell phones to class, and how teachers can begin to engage students using these devices.
I loaded my powerpoint into Zeetings and embedded one audience poll question to illustrate how easy it was for me to “push” my presentation into student devices, and to then formatively assess the audience opinions/understanding/feedback with this utility. We talked about a few other apps, management and student distraction, and did a bit of thinking outside the box.
My presentation, for those who attended (or those who did not) can be found here.
For years, I thought that Twitter was just for narcissists. I thought that all you found on Twitter were things like “I’m going for a pizza” and “selfies” – you know…. those photos that teens and young adults take of themselves with their arm outstretched, camera-phone pointed at their own face….
I was wrong. The following is just a “scratch the surface” conceptual introduction to the concept of Twitter and hashtagging.
With a limit of 145 characters on Twitter, you get a pretty succinct idea regarding your level of interest in a given article posted there. There is no superfluous language or embellishment. It cuts straight to the point. The spartan limitation is refreshing in a society that has a tendency to go on and on and on about things. Not on Twitter. You can’t ramble on Twitter.
Twitter is an incredibly powerful news feed, social feed and professional growth feed. And the driving force behind it all is the system of “hashtags”. You’ve seen hashtags around the net…. they’re those words or phrases preceded by the #. I’m not going to tackle all the geek-speak around hashtags; let’s just cut to the chase of what do they do. THEY MAKE TWITTER SEARCHABLE. Sometimes the hashtag is a tongue-in-cheek- remark about what was posted – take for example #firstworldproblems – but go ahead and put that hastag into a search on Twitter (with the #) – you might be surprised at the enlightenment you walk away with. Teams, agencies, current events all have hashtags in 2013.
I really found the power of twitter during the 2013 flooding in Calgary. All the news agencies were releasing information to twitter, as was the Mayor, the Police and the City of Calgary. To be completely on top of what was happening, I only had to key in #abflood (That was the hashtag assigned to that news event. There were other hastags, but that was the main one) to my twitter account, and all the information was there – faster than on TV; faster than on Google. With pictures, videos and articles embedded.
I saw on Facebook that the Chicago Blackhawks had won the Stanley Cup. I wasn’t sure if that was accurate or not. My first instinct was to Google it. But with only approximately 23 seconds having passed from the time of the win, and the time of my search, no one had had time to write and article, or compose a blog post on the subject. So, I went to Twitter. I figured there were probably a few things I could search. I started with #StanleyCup and voila! Confirmation of the Blackhawks’ win! Equally effective, I’m sure, would have been to search “Blackhawks” or “Bruins” or some other variation of this. Basically, there was no way I could be wrong!!
If you are a business on Twitter…. set up your hastags and use them! Every time you post, tag it. Include your hastag on your business promotions. I will have to choose a hastag for Baragar Productions – to tag everything #BaragarProductions is perhaps not so great… it eats up 19 of my 145 characters! Then again, to be completely searchable… it’s probably worth it. In my teaching career, as we move to using Twitter more and more this coming school year, we will be tagging everything with #CMJHS – is it possible that someone else might also use that tag for something else? Sure it is. It’s not foolproof.
Here’s an example of how it is not foolproof. The Toronto Blue Jays this year are using the hastag #lovethisteam and are asking that when fans tweet about the Blue Jays they tag with that. The other day, I went to check the score in the game, and a girl had put up a tweet referencing something totally different – presumably a team she plays for – and she had tagged her tweet with #lovethisteam – I had to read her “news” two or three times to realize she was talking about something totally unrelated to the Toronto Blue Jays.
Do I really care about the opinion of everyone out there on Twitter? No way. It’s like anything on the Internet… you have to pick and choose. You have to discern. Anything you tweet can be seen by anyone. Who you choose to follow in your feed is worth selecting carefully. My feed has a lot of Educators and Technology people in it. I use Facebook for socializing, and I use Twitter for my career and professional growth. Each day, there are hundreds of excellent articles posted on my Twitter feed – all of which I would love to read and absorb. I will never be able to “keep up” – but Twitter has most certainly brought new life into my career, just for existing.
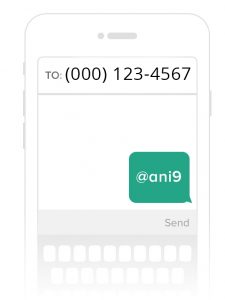
Whether you’re new to Remind, or you’ve used it before, it’s super handy to have the image that shows your “phone number” (it’s not your real phone number, it’s a number issued to you by your Remind account) that you can post in your Distributed Learning shell, you can print and hang in your classroom, you can distribute on the school website and so on…
Somewhere in Remind you can find an image like this. I know it’s there! I found it yesterday. Then I forgot where I found it, and so I wasted about another fifteen minutes trying to find it. Fifteen minutes that I didn’t really have to waste on the first day of school.
So, if you’re looking for the image, or the .pdf instructions to send home with students – here’s a quick video tutorial showing you where to find that information!!
Late assignments. It happens. So, what do you do when a student has a late assignment to hand in? Or, if you’re a student, what do you do if the deadline has come and gone and you’ve not turned in your work?
This tutorial addresses how this works, and identifies what is presently a gap in Google Classroom’s inner workings. When a student logs into their dashboard, they do not receive any alerts that there is work missing! Teachers – please let Google know that this needs to be adjusted!! (They are software engineers. They need our feedback on this stuff!)
In any case, handing in late assignments is easy. This tutorial will show you how!
Remind (formerly Remind 101) is one of the great tech tools for teachers out there. When parents and students register using your class code (this can be done via text, or through Remind’s own app for smartphones – the user can choose their preferences), teachers can send reminders out via text regarding classroom happenings.
The thing is, your remind codes start to become part of your day-to-day teaching experience. They’re on your course outline, newsletters, booklets – pretty soon they’re everywhere and you don’t want to be changing the code each year.
Clearing our last year’s students so that you can reuse your codes is incredibly easy. Here is a 1:22 video showing you how to “clean house” so you’re ready for this school year!!
I’m serious!! With this feature of Google Classroom, you, the teacher will never find yourself empty-handed again. It works for word-processed documents, google sheets and google slide presentations. (This can also include work that students collaborate on, they just have to choose “whose” document they are going to work on.
Even if a student doesn’t finish an assignment.
Even if they don’t hand it in to you.
Even if it is totally finished and they forget to hand it in to you.
It’s not possible for them to have lost it – it’s in Google Drive!
Even if they just grunt when you ask them what their plans are for finishing it…
SOMETHING IS BETTER THAN NOTHING. And as a teacher, you will never have “nothing” again (unless, of course, the student for-real does nothing, and that’s rare!)
Today we will take a quick peek at how a teacher can grade assignments in Google Classroom, and how formative assessment can be carried out. While the examples shown are very surface so as to keep the video moving along quickly, the private conversations between student and teacher can be very robust within this Distributed Learning environment.
We will also take a peek at the Google Drive Folder and its contents to illustrate how the teacher has a coy that remains in their Google Drive (even if a student unsubmits and resubmits an assignment).
The past two blog posts and videos have taken care of the basic setup of a class within the Google Classroom environment. Today we are going to tackle the very simple task of creating an assignment for one of our classes.
As you will see in the video, it’s incredibly easy, and one assignment can be deployed to multiple classes simultaneously (which is superb for teachers like me who may have 7 instances of the same class – I teach CTF 7 to seven different classes each year).
The video also shows you what your students will see when they log in to view and submit their first assignment. It’s not easy to assist students with their challenges if you haven’t seen the actual process yourself, so I’ve taken about four minutes within the video to demonstrate what students will experience when they access Google Classroom to view and submit an assignment.
Today we need to add out students into our newly created class in Google Classroom. It’s easily done – either by the teacher inviting students (if you have a superstar technician, this may be integrated with your SIS Database [Powerschool in my division]) or by giving students a random access code that they enter to gain access to your classroom.
The tutorial starts out in the teacher dashboard, then at about 2:10 takes on the student perspective of registering in a course, then returns to the teacher dashboard to illustrate how the students have populated a class list by registering.
Here is a the first of a series of video tutorials that I will be creating as the new school year approaches to assist you with setting up and making the best use of the Google Classroom Environment.
Google classroom can assist you with easily creating a distributed learning environment, completing formative assessments and staying on top of which of your students are missing assignments. We will work through those aspects of Classroom over the next couple weeks. Tonight we’ll start with how to set up your first class in Google Classroom.
Note: All accounts used for these tutorials are fake. As is addressed at the start of this video, a random name generator was used to create the accounts, and any assignments or work that appears to be turned in to illustrate the inner workings of Google Classroom in the future will be created by me for the purposes of these demonstrations. No real student work will be used for these video tutorials.